Relion Blood Glucose Meter Manual: A Comprehensive Guide
This manual provides essential guidance for using your ReliOn Prime Blood Glucose Monitoring System‚ crucial for managing diabetes effectively through regular testing and informed healthcare decisions․
The ReliOn Blood Glucose Meter is a vital tool for individuals managing diabetes‚ enabling frequent blood glucose testing to understand how diet‚ exercise‚ and medication impact blood sugar levels․ This system empowers proactive diabetes management‚ facilitating informed decisions alongside your healthcare provider․
Regular monitoring helps achieve target blood glucose ranges‚ minimizing long-term health complications․ The ReliOn meter offers a convenient and reliable way to track glucose trends‚ utilizing small blood samples and providing quick‚ easy-to-read results․ Understanding your meter’s features and following the instructions within this manual are key to accurate and effective self-monitoring․
Understanding Blood Glucose Monitoring
Blood glucose monitoring is a cornerstone of diabetes management‚ providing insights into how your body processes sugar․ Elevated blood sugar‚ over time‚ contributes to diabetes development and complications․ Regular testing reveals patterns‚ helping you adjust lifestyle choices and medication as needed․
Consistent monitoring allows you to understand the impact of food‚ physical activity‚ and stress on your glucose levels․ This data‚ shared with your healthcare provider‚ informs personalized treatment plans․ Accurate readings are crucial; therefore‚ proper technique and meter maintenance‚ as detailed in this manual‚ are essential for reliable results․
Setting Up Your Relion Meter
Proper setup ensures accurate readings․ This involves carefully unboxing components‚ correctly inserting the battery‚ and precisely setting the date and time for reliable tracking․
Unboxing and Component Identification
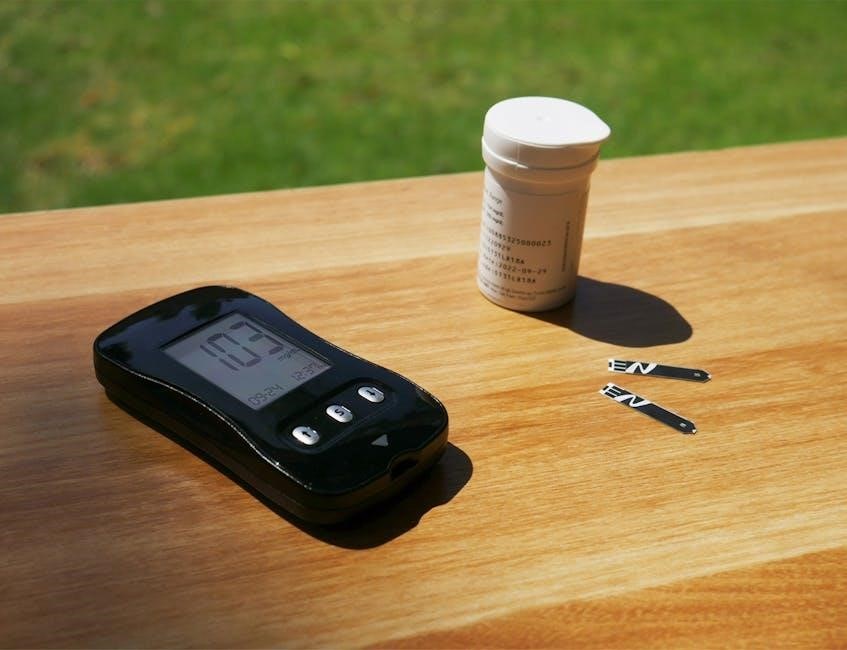
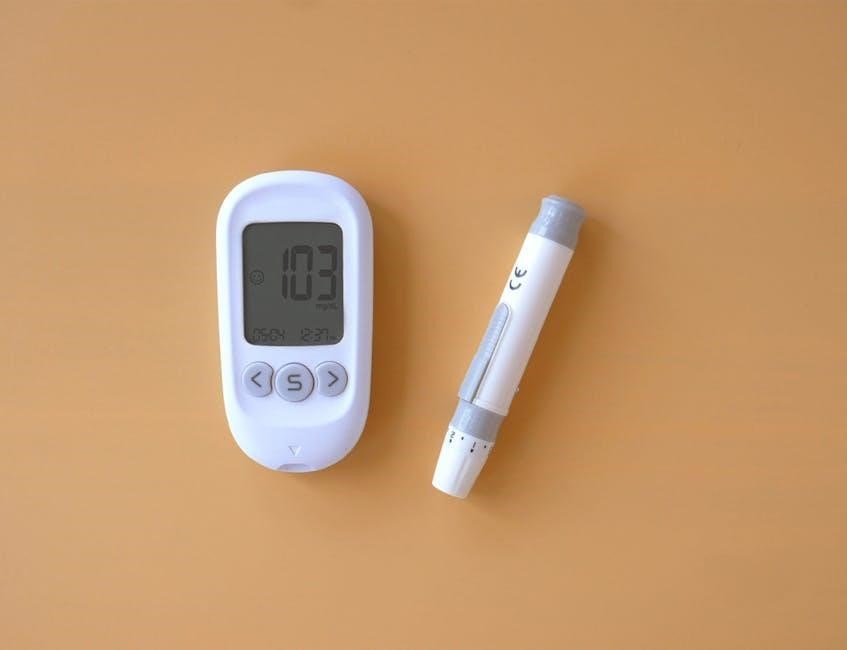
Upon opening your ReliOn Prime Blood Glucose Monitoring System‚ carefully verify all components are present․ You should find the blood glucose meter itself‚ a lancing device‚ lancets (small‚ sterile needles)‚ test strips‚ a control solution‚ a user manual‚ and potentially batteries․
Familiarize yourself with each part․ The meter displays readings‚ the lancing device punctures skin for blood‚ and test strips hold the blood sample․ The control solution verifies meter and strip functionality․ Refer to the diagrams in your manual to correctly identify each component before proceeding with setup and testing․ Missing components should be reported to the retailer immediately․
Inserting the Battery
To power your ReliOn Prime meter‚ locate the battery compartment – typically on the back or side․ Gently slide off the battery cover․ Insert the specified battery type (usually AAA or AA‚ check your manual) ensuring correct polarity‚ matching the (+) and (-) symbols inside the compartment․
A secure fit is crucial for accurate readings․ Replace the battery cover until it clicks firmly into place․ If the meter doesn’t power on‚ double-check the battery’s orientation and ensure it’s fresh․ Dispose of used batteries responsibly according to local regulations․
Setting the Date and Time
Accurate date and time settings are vital for correctly timestamping your blood glucose readings‚ enabling effective tracking and analysis of your diabetes management․ Access the date and time setting menu through the meter’s buttons – consult your specific model’s manual for instructions․
Typically‚ you’ll navigate through year‚ month‚ day‚ hour‚ and minute settings using the up/down buttons․ Confirm each selection by pressing the ‘OK’ or ‘Set’ button․ Ensure the correct AM/PM designation is chosen․ Proper timekeeping aids in correlating readings with meals and activities․
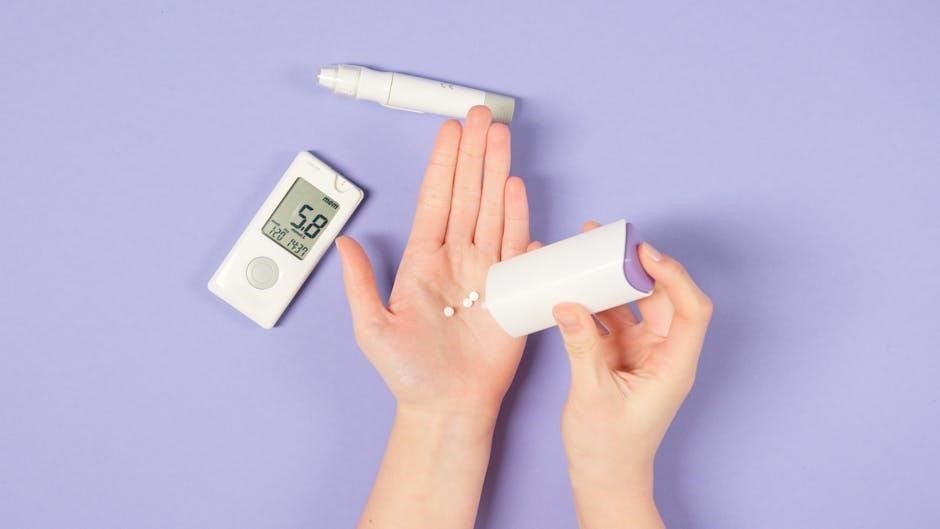
Performing a Blood Glucose Test
Testing involves preparing the lancing device‚ inserting a test strip‚ applying a blood sample‚ and then carefully reading and interpreting the displayed glucose result for effective monitoring․
Preparing the Lancing Device
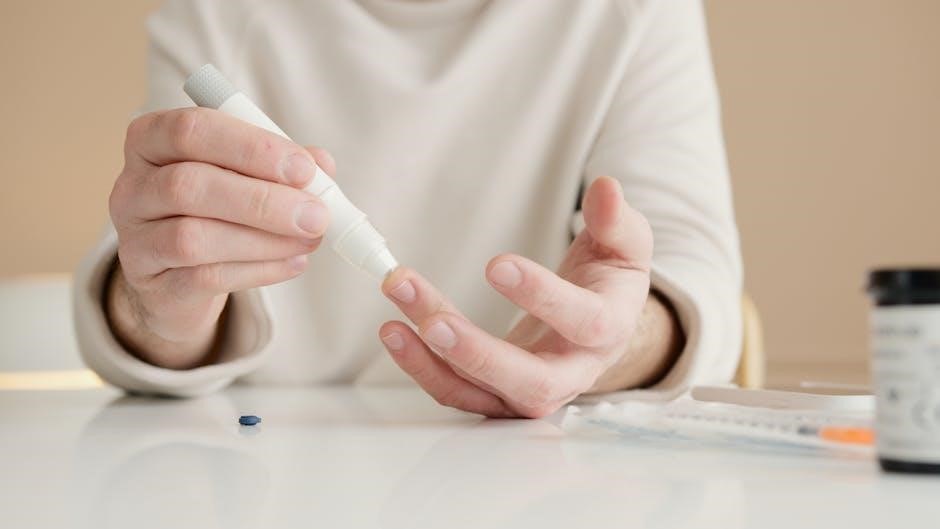
To begin‚ firmly attach a new‚ sterile lancet into the lancing device‚ twisting the protective cover off before securely inserting it․ Adjust the depth setting according to your skin type – lower settings are generally suitable for thinner skin‚ while higher settings may be needed for thicker skin․
Cock the lancing device‚ priming it for use‚ and ensure you have a clean alcohol wipe ready to disinfect the fingertip before lancing․ Select a puncture site on the side of your fingertip‚ avoiding the center‚ as this area is more sensitive․ Proper preparation minimizes discomfort and ensures an adequate blood sample․
Inserting a Test Strip
Ensure your hands are clean and dry before handling test strips․ Gently remove a single test strip from the vial‚ avoiding touching the copper test area․ Immediately insert the test strip into the meter’s designated port‚ matching the orientation indicated on the strip and meter․
The meter will typically power on automatically upon strip insertion‚ displaying a readiness symbol․ If it doesn’t‚ ensure the strip is fully inserted and the battery has sufficient charge․ Do not reuse test strips‚ as this can lead to inaccurate results․ The meter is now prepared to receive the blood sample․
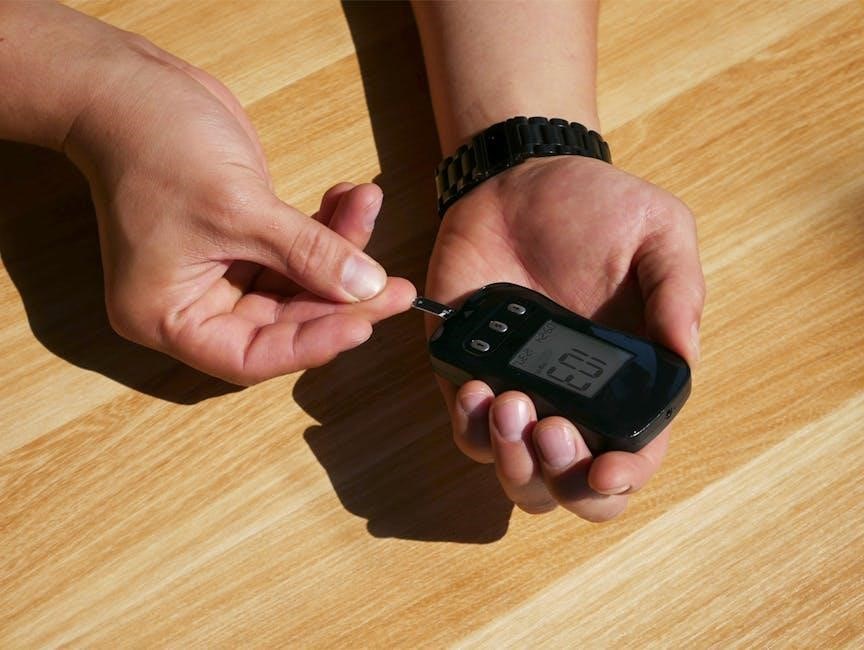
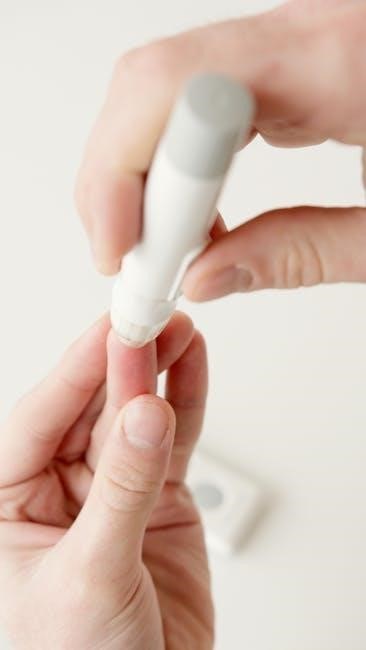
Applying the Blood Sample
Gently squeeze or milk the fingertip to obtain a small‚ hanging drop of blood․ Avoid excessive squeezing‚ which can dilute the sample and affect accuracy․ Bring the blood drop into contact with the designated sample area on the test strip – the meter will usually beep or display a symbol indicating sufficient sample uptake․
Do not smear or wipe the blood onto the strip; allow it to be drawn in by capillary action․ Insufficient sample size is a common cause of errors‚ so ensure adequate blood is applied․ Keep the meter and strip steady until the reading appears․
Reading and Interpreting Results
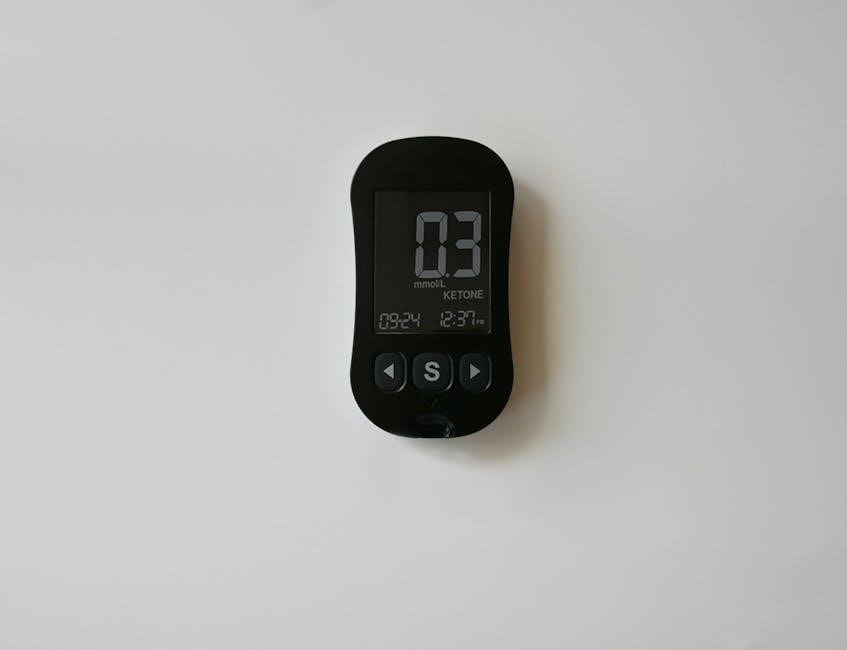
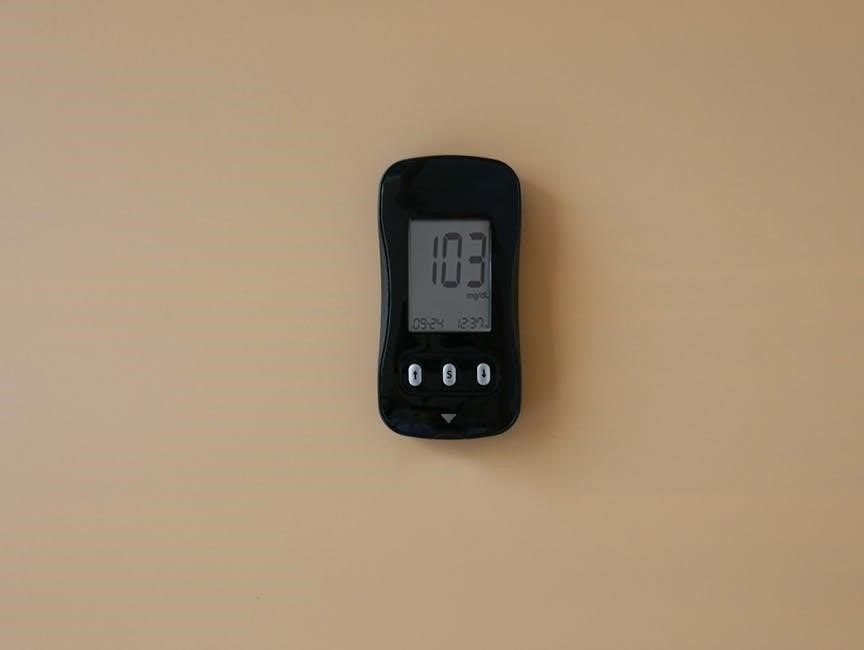
Your ReliOn meter will display your blood glucose level in milligrams per deciliter (mg/dL) within seconds of applying the blood sample․ Compare this reading to your target range‚ as determined by your healthcare provider․ Understanding your target range is vital for effective diabetes management․
Record your results in a logbook or utilize the meter’s memory function to track trends․ Be aware of factors influencing readings‚ such as meals‚ exercise‚ and medication․ Consult your doctor for guidance on interpreting results and adjusting your diabetes care plan accordingly․
Relion Meter Features & Functions
The ReliOn meter offers memory recall for past readings‚ average calculation to understand trends‚ and displays error codes for troubleshooting‚ enhancing diabetes self-management․
Memory Recall – Reviewing Past Readings
Your ReliOn meter stores previous blood glucose readings‚ allowing you to track your levels over time․ Accessing this memory is simple: consult your meter’s user manual for specific button sequences․ Typically‚ you’ll use the ‘up’ and ‘down’ buttons to scroll through your history․
This feature is invaluable for identifying patterns‚ understanding how diet and exercise affect your glucose‚ and sharing data with your healthcare provider․ The number of readings stored varies by model‚ so familiarize yourself with your meter’s capacity․ Regularly reviewing your readings empowers you to make informed decisions about your diabetes management plan․
Average Calculation – Understanding Your Trends
Many ReliOn meters automatically calculate average blood glucose readings‚ typically over 7‚ 14‚ or 30 days․ This feature provides a broader perspective than single readings‚ revealing trends in your glucose control․ Accessing the average is usually done through the meter’s menu – refer to your manual for precise steps․
Understanding these averages helps you and your doctor assess the effectiveness of your treatment plan․ Significant fluctuations may indicate a need for adjustments to medication‚ diet‚ or exercise․ Consistent monitoring and trend analysis are key to proactive diabetes management and achieving optimal health outcomes․
Error Codes and Troubleshooting
Your ReliOn meter displays error codes to indicate potential problems․ Common codes include those related to insufficient blood sample‚ strip errors‚ or meter malfunction․ The user manual provides a comprehensive list of codes and their meanings‚ alongside suggested solutions․
Troubleshooting often involves retesting with a new strip‚ ensuring proper strip insertion‚ or verifying the lancing device settings․ If errors persist‚ avoid self-repair and contact ReliOn customer support or your healthcare provider․ Accurate readings are vital; don’t ignore or dismiss error messages․

Calibration and Quality Control
Regular calibration and quality checks ensure accurate results․ Utilizing control solution verifies the meter and strips are functioning correctly‚ promoting reliable diabetes management․
Why Calibration is Important

Calibration is a vital step in ensuring the accuracy of your ReliOn blood glucose meter readings․ Factors like temperature‚ humidity‚ and even slight variations in manufacturing can impact performance․ Performing calibration checks confirms that the meter and test strips are working harmoniously‚ delivering dependable results you can trust․
Without regular calibration‚ readings may be skewed‚ potentially leading to incorrect treatment decisions․ This is particularly crucial for individuals managing diabetes‚ where precise blood glucose levels directly influence medication dosages and lifestyle adjustments․ Calibration provides peace of mind‚ knowing your meter is providing a reliable snapshot of your current glucose status․
Performing a Calibration Check
To perform a calibration check with your ReliOn meter‚ you’ll typically need a calibration solution – not included with all kits․ Consult your meter’s specific manual for detailed instructions‚ as procedures can vary slightly between models․ Generally‚ you’ll insert a test strip‚ apply a small drop of the calibration solution‚ and the meter will display a result․
Compare this result to the value range printed on the calibration solution vial․ If the reading falls within the acceptable range‚ your meter is properly calibrated․ If not‚ repeat the process or contact customer support․ Always follow the quality control guidelines outlined in your manual․
Using Control Solution
Control solution verifies your meter and test strips are working correctly․ It’s crucial to use control solution when opening a new vial of test strips‚ if you suspect inaccurate results‚ or as recommended by your healthcare provider․ Apply a drop of control solution to a test strip as if it were a blood sample․
The meter will display a result; compare this to the range printed on the control solution vial․ Results within range confirm proper function․ If outside the range‚ repeat the test or contact customer support․ Do not use control solution for diagnosis or treatment decisions․
Advanced Relion Meter Usage
Explore features like Alternate Site Testing (AST) – if your meter supports it – and data connectivity options for enhanced diabetes management and tracking․
Alternate Site Testing (AST) – Finger vs․ Forearm
Alternate Site Testing (AST) allows blood glucose monitoring from locations other than the fingertips‚ typically the forearm or palm․ However‚ not all ReliOn Premier meters support AST; always consult your meter’s user manual to confirm compatibility․
AST can reduce discomfort‚ as fingers are less sensitive than alternate sites․ Blood glucose levels from alternate sites may differ slightly from fingertip readings‚ especially after meals‚ exercise‚ or during periods of rapid glucose change․ Fingertip testing remains the gold standard when accuracy is critical․ If results seem inconsistent‚ revert to fingertip testing and consult your healthcare provider․
Proper technique is vital for accurate AST results․ Ensure the site is clean and warm to promote adequate blood flow․
Data Port and Connectivity Options
Certain ReliOn meter models feature data ports‚ typically micro-USB‚ enabling data transfer to computers or smartphones for detailed analysis and record-keeping․ Connectivity options vary by model; check your specific meter’s specifications․
Data download software‚ often available from the manufacturer’s website‚ allows you to visualize trends‚ generate reports‚ and share information with your healthcare provider․ Some meters may also integrate with mobile apps via Bluetooth‚ offering convenient data logging and management on your smartphone․
Utilizing these connectivity features empowers proactive diabetes management and facilitates informed discussions with your doctor․
Maintaining Your Relion Meter
Proper meter care ensures accuracy and longevity․ Regularly clean and disinfect the device‚ store test strips correctly‚ and replace batteries promptly for optimal performance․
Cleaning and Disinfection
Maintaining a clean meter is vital for accurate readings and preventing the spread of infection․ After each use‚ wipe the meter’s exterior with a lightly dampened cloth․ Avoid harsh chemicals or abrasive cleaners‚ as these can damage the device․
You can use a solution of 70% isopropyl alcohol on a cloth to disinfect the meter‚ but ensure no liquid enters the port or screen․ Never submerge the meter in water or any other liquid․ Allow the meter to air dry completely before inserting a new test strip․ Regular cleaning contributes to the longevity and reliable performance of your ReliOn meter‚ supporting effective diabetes management․
Test Strip Storage Guidelines
Proper test strip storage is crucial for accurate blood glucose readings․ Always store test strips in their original vial‚ tightly closed‚ in a cool‚ dry place․ Avoid direct sunlight and extreme temperatures․ Do not store strips in humid environments like bathrooms․
Check the expiration date on the vial before each use; expired strips can yield inaccurate results․ Once opened‚ use strips immediately and reseal the vial tightly․ Discard any strips that appear damaged or discolored․ Following these guidelines ensures the reliability of your ReliOn meter and supports effective diabetes self-management․
Battery Replacement
When the low battery indicator appears on your ReliOn meter‚ it’s time for a replacement․ Use only the specified battery type (typically AAA) to avoid damaging the device․ Gently slide off the battery cover‚ usually located on the back of the meter․ Remove the old battery and insert the new one‚ ensuring correct polarity (+ and -) as indicated inside the compartment․
Replace the battery cover securely․ A depleted battery can cause inaccurate readings or meter malfunction․ Regularly check battery levels to maintain consistent monitoring and reliable results for effective diabetes management․
Troubleshooting Common Issues
Addressing problems like inaccurate readings‚ meter failures‚ or error messages is vital for consistent monitoring․ Consult the manual for specific error code explanations and solutions․
Inaccurate Readings – Potential Causes
Several factors can contribute to inaccurate blood glucose readings with your ReliOn meter․ Expired or damaged test strips are a common culprit‚ so always check the expiration date and ensure proper storage․ Improper blood sample application – too little or too much blood – can also skew results․
Ensure your hands are clean and dry before testing‚ as contaminants can interfere with the reading․ Calibration issues or a malfunctioning meter can also lead to inaccuracies; perform calibration checks regularly using control solution․ Finally‚ remember that alternate site testing (AST) may yield slightly different results than fingertip testing․
Meter Not Turning On
If your ReliOn meter fails to power on‚ several simple checks can resolve the issue․ First‚ verify the batteries are correctly installed and haven’t expired; replace them with fresh ones if necessary․ Ensure the battery compartment is clean and free of corrosion‚ as this can disrupt the connection․
A completely discharged battery‚ even if recently replaced‚ might require a few moments to initiate power․ If the problem persists‚ try resetting the meter – consult your user manual for specific reset instructions․ If none of these steps work‚ contact customer support for assistance․
Error Messages and Their Meanings
Your ReliOn meter displays error codes to indicate specific issues during testing․ Common errors include “LO” or “HI‚” signifying blood glucose levels outside the meter’s measurable range – retest with a fresh sample․ “E-1” often indicates a test strip issue; ensure proper insertion and check the expiration date․
“E-2” may signal a problem with the lancing device or blood sample application․ Refer to your meter’s manual for a complete list of error codes and their corresponding solutions․ Addressing these errors promptly ensures accurate readings and effective diabetes management․
Relion Meter and Diabetes Management
Integrating meter data with your healthcare provider is vital for personalized diabetes care‚ enabling adjustments to treatment plans based on target blood glucose ranges․
Integrating Meter Data with Your Healthcare Provider
Regularly sharing your ReliOn meter data with your doctor is a cornerstone of effective diabetes management․ This allows for informed decisions regarding medication adjustments‚ dietary modifications‚ and exercise plans tailored to your specific needs․
Consider utilizing the meter’s memory recall function to download readings or simply bring a logbook of your results to appointments․ Discussing trends‚ averages‚ and any unusual readings empowers your healthcare provider to optimize your treatment strategy․ Proactive communication ensures a collaborative approach to achieving and maintaining optimal blood glucose control‚ ultimately improving your overall health and well-being․
Understanding Target Blood Glucose Ranges
Establishing personalized target blood glucose ranges with your healthcare provider is vital for successful diabetes management․ These ranges aren’t universal; they depend on factors like age‚ overall health‚ diabetes type‚ and treatment plan․
Generally‚ a target range before meals might be 80-130 mg/dL‚ and 180 mg/dL or less two hours after starting a meal․ However‚ your doctor will define your ideal levels․ Consistent monitoring with your ReliOn meter helps you understand how food‚ exercise‚ and medication impact your glucose‚ enabling adjustments to stay within these personalized targets and minimize complications․
Resources for Diabetes Education
Empowering yourself with knowledge is key to effectively managing diabetes․ Numerous resources are available to supplement your ReliOn meter usage and overall care․ The American Diabetes Association (diabetes․org) offers comprehensive information‚ support‚ and educational programs․
Similarly‚ the National Institute of Diabetes and Digestive and Kidney Diseases (niddk․nih․gov) provides research-backed guidance․ Your healthcare provider can also recommend local diabetes education classes and support groups․ Utilizing these resources alongside consistent blood glucose monitoring with your ReliOn meter fosters proactive self-management and improved health outcomes․