This RV wiring guide is a comprehensive resource for understanding and working with the electrical systems in your RV. It provides detailed information on various aspects of RV wiring‚ including AC and DC power‚ plug types and connectors‚ wiring diagrams‚ DIY projects‚ troubleshooting‚ and safety tips.
Understanding RV Electrical Systems
RVs are equipped with unique electrical systems that power various amenities and appliances. Understanding the basics of RV electrical systems is crucial for safe and efficient RV operation. Here’s a breakdown of key components⁚
- Battery Bank⁚ The heart of the DC system‚ the battery bank provides power for essential functions like lights‚ water pumps‚ and appliances when the RV is not connected to shore power or a generator.
- Converter⁚ This device converts AC power from shore power or a generator to DC power for charging the batteries. It also supplies DC power to the RV’s 12-volt system.
- Inverter⁚ An inverter converts DC power from the battery bank to AC power‚ allowing you to run AC appliances like microwaves‚ air conditioners‚ and other household devices.
- Shore Power Cord⁚ This cord connects your RV to an external power source‚ usually a pedestal at a campground. Shore power provides AC electricity to your RV.
- Generator⁚ An optional but valuable addition‚ a generator produces AC power‚ allowing you to operate your RV’s AC system and appliances when not connected to shore power.
- RV Electrical Panel⁚ This panel houses circuit breakers‚ fuses‚ and switches that control the flow of electricity throughout your RV.
It’s essential to know the different types of circuits and their appropriate uses. For example‚ a 12-volt circuit is designed for low-power appliances‚ while a 120-volt circuit can handle higher-power devices. Additionally‚ understanding the role of fuses and circuit breakers in protecting your RV’s electrical system is vital.
Familiarizing yourself with your RV’s electrical system will help you maintain it effectively‚ troubleshoot any issues‚ and ensure your RV operates safely and efficiently.
AC and DC Power in RVs
RVs utilize both AC (alternating current) and DC (direct current) power to operate various systems and appliances. Understanding the differences between these two types of electricity is crucial for safe and efficient RV operation.
AC Power⁚ This type of electricity is what you find in most homes and is used for high-power appliances such as refrigerators‚ air conditioners‚ and microwaves. In RVs‚ AC power is typically supplied by⁚
- Shore Power⁚ This is the most common source of AC power in RVs‚ obtained by plugging into an external power source‚ such as a pedestal at a campground.
- Generator⁚ A generator can produce AC power‚ providing power when you’re not connected to shore power.
DC Power⁚ This type of electricity is used for lower-power appliances and systems like lights‚ water pumps‚ and some electronic devices. In RVs‚ DC power is typically supplied by⁚
- Battery Bank⁚ The RV’s battery bank provides DC power when not connected to shore power or a generator.
- Converter⁚ This device converts AC power from shore power or a generator to DC power‚ charging the battery bank and powering the 12-volt system.
The two RV electrical systems‚ AC and DC‚ work together to ensure uninterrupted power. When you connect your RV to shore power‚ the converter charges the battery bank‚ supplying both AC and DC power. When you’re off-grid‚ the battery bank powers the DC system‚ and an inverter can be used to convert DC power to AC power for specific appliances.
Understanding the differences between AC and DC power and their sources will help you manage your RV’s electrical system effectively‚ ensuring you have adequate power for all your needs.
Types of RV Plugs and Connectors
RVs use various plugs and connectors to connect to power sources and transfer electricity. It’s essential to understand the different types and their functionalities to ensure proper connections and safe power transfer. Here are some common RV plugs and connectors⁚
- 30-Amp RV Plug⁚ This is a three-prong plug commonly found on RVs with lower power requirements. It provides 120 volts of AC power and has a maximum amperage rating of 30 amps. It’s typically used for smaller RVs or those with moderate electrical needs.
- 50-Amp RV Plug⁚ This plug has four prongs and is used for RVs with higher power demands. It delivers 240 volts of AC power and has a maximum amperage rating of 50 amps. This plug is essential for RVs with air conditioning‚ multiple appliances‚ or other high-power features.
- 7-Pin RV Connector⁚ This connector is primarily for trailers and provides a connection for various functions‚ including taillights‚ brake lights‚ turn signals‚ and running lights. It also includes a ground wire for safety.
- 4-Pin RV Connector⁚ This connector is used for trailers and primarily provides power for the trailer’s lights. It includes wires for taillights‚ brake lights‚ turn signals‚ and running lights but doesn’t include a ground wire.
- 12-Volt DC Socket⁚ These sockets are commonly found inside RVs and are used to power various DC appliances and accessories. These sockets typically use a cigarette lighter plug‚ but some RVs might have different styles.
It’s crucial to match the plug and connector types to avoid mismatches and potential damage to your RV’s electrical system. Before plugging in‚ always ensure the voltage and amperage ratings are compatible with your RV’s requirements. If you’re unsure‚ consult your RV’s manual or a qualified electrician.
Understanding the different types of RV plugs and connectors will help you safely connect your RV to power sources and ensure that your appliances receive the necessary power for proper operation.
RV Wiring Diagrams
RV wiring diagrams are essential tools for understanding and troubleshooting the electrical systems in your RV. These diagrams visually represent the flow of electricity throughout the RV‚ showing the connections between wires‚ components‚ and appliances. They are crucial for identifying potential problems‚ tracing circuits‚ and making repairs.
RV wiring diagrams typically include the following information⁚
- Components⁚ The diagram clearly labels all electrical components‚ such as batteries‚ converters‚ inverters‚ breakers‚ switches‚ outlets‚ and appliances.
- Wires⁚ Wires are represented by lines with different colors to indicate their functions. Common wire colors include black for positive‚ white for neutral‚ green for ground‚ and red for a secondary hot wire.
- Circuits⁚ The diagram shows the different electrical circuits within the RV‚ including the AC power system‚ the DC power system‚ and the lighting circuits. This helps you understand how electricity flows through the RV.
- Connections⁚ The diagram illustrates how the various components are connected‚ including the points where wires are spliced‚ joined‚ or terminated.
RV wiring diagrams can be found in various forms‚ including⁚
- RV Owner’s Manual⁚ Many RV manufacturers provide wiring diagrams in the owner’s manual‚ which is a good starting point for understanding your RV’s electrical system.
- Online Resources⁚ Several websites offer free or paid RV wiring diagrams for specific RV models. These websites can be helpful if you can’t find your diagram in the owner’s manual.
- RV Dealerships⁚ RV dealerships often have access to wiring diagrams for various RV models and can provide assistance in interpreting them.
By studying the wiring diagrams‚ you can gain a better understanding of how your RV’s electrical system works. This knowledge can help you troubleshoot problems‚ identify potential hazards‚ and make informed decisions about electrical repairs or upgrades.
DIY RV Wiring Projects
For the adventurous RV owner‚ tackling DIY wiring projects can be a rewarding way to customize your RV and save money. However‚ electrical work can be complex and potentially dangerous‚ so it’s crucial to prioritize safety and have a good understanding of basic electrical principles before embarking on any DIY project.
Here are some common DIY RV wiring projects that you might consider⁚
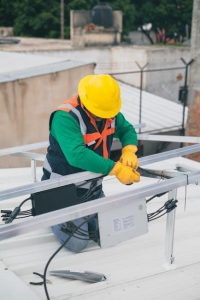
- Adding a Solar Panel System⁚ Installing a solar panel system can provide a reliable source of power while boondocking. This project involves connecting solar panels to a charge controller‚ batteries‚ and your RV’s electrical system.
- Upgrading Lighting⁚ Replacing standard incandescent bulbs with LED lights can significantly reduce energy consumption and increase brightness. This project usually involves simply swapping out the bulbs.
- Installing a New Appliance⁚ Adding a new appliance like a microwave‚ refrigerator‚ or air conditioner requires wiring it to the RV’s electrical system. This project involves connecting the appliance to a dedicated circuit and ensuring proper grounding.
- Adding a Power Inverter⁚ Installing a power inverter allows you to use AC appliances while running on battery power. This project involves connecting the inverter to the batteries and the RV’s electrical system.

Before starting any DIY wiring project‚ it’s essential to⁚
- Consult the RV Owner’s Manual⁚ The owner’s manual often provides wiring diagrams and instructions for common RV modifications.
- Research Thoroughly⁚ Gather information from reliable sources‚ including online forums‚ YouTube tutorials‚ and RV repair manuals.
- Consider the Complexity⁚ Evaluate the project’s difficulty level and your own electrical knowledge. Don’t hesitate to seek professional help if you’re unsure about any aspect of the project.
- Prioritize Safety⁚ Always disconnect power before working on any electrical components. Use appropriate tools and safety gear‚ such as insulated gloves and non-conductive mats.
- Test Thoroughly⁚ Once the project is complete‚ thoroughly test all components and circuits to ensure they are functioning correctly and safely.
Remember‚ DIY wiring projects can be challenging but rewarding. By following safety guidelines and acquiring the necessary knowledge‚ you can successfully enhance your RV’s electrical system and enjoy the satisfaction of a job well done.
Troubleshooting RV Electrical Issues
RV electrical systems can be prone to issues‚ especially after years of use or exposure to the elements. Troubleshooting these problems can be a daunting task‚ but with a systematic approach and a basic understanding of electrical principles‚ you can often identify and resolve the issue yourself.
Here’s a step-by-step guide to troubleshooting RV electrical issues⁚
- Identify the Problem⁚ Begin by clearly defining the issue. Is it a complete power outage‚ a flickering light‚ a malfunctioning appliance‚ or a problem with the battery charging system?
- Check the Basics⁚ Ensure that all fuses and circuit breakers are in good working order and not tripped. Inspect the shore power cord for any damage or loose connections. If you’re using a generator‚ make sure it’s running properly and providing adequate power.
- Test the Power Source⁚ Use a multimeter to check the voltage at the power source. If the voltage is low or fluctuating‚ it could indicate a problem with the power source itself‚ such as a faulty generator or a problem with the campground’s electrical system.
- Inspect Wiring and Connections⁚ Carefully examine all wiring and connections for any signs of damage‚ corrosion‚ or loose connections. Pay particular attention to areas that are exposed to moisture or vibration.
- Isolate the Fault⁚ If you suspect a faulty appliance‚ try disconnecting it from the system and see if the problem persists. This can help you narrow down the source of the issue.
- Consult Wiring Diagrams⁚ Use RV wiring diagrams to trace the flow of electricity and identify potential problem areas. These diagrams can be found in your RV’s owner’s manual or online.
- Seek Professional Help⁚ If you’re unable to identify or resolve the problem yourself‚ don’t hesitate to contact a qualified RV technician. They have the expertise and tools to diagnose and repair complex electrical issues safely and effectively.
Remember‚ electrical work can be dangerous. Always prioritize safety by disconnecting power before working on any electrical components‚ using appropriate tools and safety gear‚ and consulting a professional if you’re unsure about any aspect of the repair. By following these steps and taking the necessary precautions‚ you can successfully troubleshoot and resolve most RV electrical issues.
Safety Tips for RV Wiring
Working with RV wiring requires a high level of caution and adherence to safety practices. Improper wiring can lead to electrical shocks‚ fires‚ and other hazards. It’s crucial to prioritize safety throughout the entire process‚ from planning and installation to maintenance and troubleshooting.
Here are some essential safety tips for RV wiring⁚
- Disconnect Power⁚ Always disconnect power to the RV before working on any electrical components. This is essential for preventing electrical shocks and ensuring a safe working environment.
- Use the Right Tools⁚ Employ the correct tools for the job. Use insulated screwdrivers‚ wire strippers‚ crimpers‚ and other tools designed for electrical work. Avoid using tools that are damaged or have exposed metal parts.
- Inspect Wiring⁚ Regularly inspect all wiring for signs of damage‚ wear‚ or corrosion. Replace any damaged or compromised wiring immediately.
- Secure Connections⁚ Ensure all connections are secure and tight. Loose connections can cause overheating‚ sparking‚ and potential fire hazards.
- Use Proper Wire Gauge⁚ Select the appropriate wire gauge for the amperage requirements of the circuit. Using undersized wire can lead to overheating and potential fire hazards.
- Protect Wiring⁚ Protect wiring from exposure to moisture‚ heat‚ and abrasion. Use wire loom or conduit to protect wiring in areas where it’s exposed to the elements or mechanical stress.
- Grounding⁚ Ensure that all electrical components are properly grounded. Grounding provides a path for stray electrical current to flow safely to the ground‚ preventing shocks and equipment damage.
- Circuit Breakers⁚ Use circuit breakers to protect wiring from overloads. Circuit breakers interrupt the flow of electricity if a circuit becomes overloaded‚ preventing overheating and potential fires.
- Professional Help⁚ If you’re not comfortable working with electrical systems‚ seek professional help from a qualified RV technician. They have the expertise and training to handle electrical work safely and effectively.
By following these safety tips‚ you can significantly reduce the risk of electrical hazards and ensure the safety of yourself and your RV. Remember‚ safety should always be the top priority when working with RV wiring.


